Nmap Tracker
As an alternative to the router-based device tracking, it is possible to directly scan the network for devices by using Nmap. The IP addresses to scan can be specified in any format that Nmap understands, including the network-prefix notation (192.168.1.1/24) and the range notation (192.168.1.1-255).
Please keep in mind that modern smart phones will usually turn off WiFi when they are idle. Simple trackers like this may not be reliable on their own.
If you are running Home Assistant Core in a Python virtual environment, you might have to install the packages for arp and nmap.
On Debian based hosts (for example Raspbian) do so by running sudo apt-get install net-tools nmap.
On a Fedora host run sudo dnf -y install nmap.
配置
要将 Nmap Tracker integration 添加到您的 Home Assistant 实例中,请使用此 My 按钮:

如果上述 My 按钮不起作用,您也可以手动执行以下步骤:
-
浏览到您的 Home Assistant 实例。
-
转到
设置 > 设备与服务。 -
在右下角,选择
Add Integration 按钮。 -
从列表中选择 Nmap Tracker。
-
按照屏幕上的说明完成设置。
An example of how the Nmap scanner can be customized:
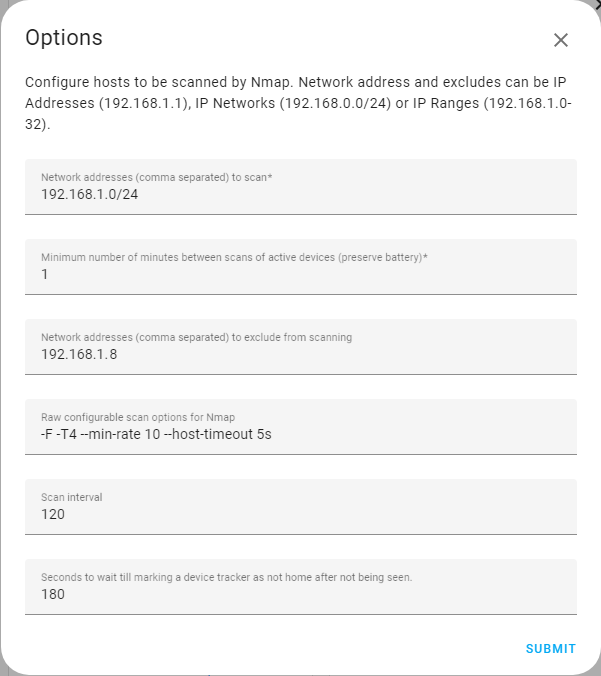
Network range to scan using CIDR notation192.168.1.1 to 192.168.1.254.
Frequency of the scans. The lower the number, the quicker it will detect devices connected and disconnected usually at the cost of the devices battery life. The example above will scan every minute.
A comma-separated list of IP addresses not to scan. The above example will skip 192.168.1.8.
Nmap command line parameters which can be used to configure how Nmap scans the network. For more details see Nmap reference guide
See the device tracker integration page for instructions how to configure the people to be tracked.