Landis+Gyr Heat Meter
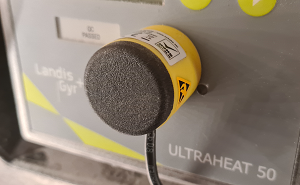
The Landis+Gyr Heat Meter integration for Home Assistant allows you to read the meter values from Ultraheat devices by Landis & Gyr. These devices are commonly used for district heating. The integration has been tested with the Landis & Gyr Ultraheat 50 (UH50), type LUGCUH50. Other models are likely to work as well.
The device is read through the optical interface. An (USB) IR reader is needed and connected to Home Assistant.
配置
要将 Landis+Gyr Heat Meter integration 添加到您的 Home Assistant 实例中,请使用此 My 按钮:

如果上述 My 按钮不起作用,您也可以手动执行以下步骤:
-
浏览到您的 Home Assistant 实例。
-
转到
设置 > 设备与服务。 -
在右下角,选择
Add Integration 按钮。 -
从列表中选择 Landis+Gyr Heat Meter。
-
按照屏幕上的说明完成设置。
Sensors
The integration will create the following sensors:
- Heat usage (MWh)
- Volume usage (m3)
To be compatible with the Home Assistant energy units of measurement, heat usage is converted to MWh, from usage in GJ, which is supplied by the device, using a conversion factor: 1 GJ = 0.277778 MWh.
Further data that is read from the device is added as diagnostic entities:
- Heat usage measured in GJ, as is read from the device before conversion
- Ownership number
- Volume previous year (m3)
- Heat previous year (MWh)
- Heat previous year (GJ)
- Error number
- Device number
- Measurement period minutes
- Power max (kW)
- Power max previous year (kW)
- Flow rate max (m3ph)
- Flow rate max previous year (m3ph)
- Flow temperature max (°C)
- Return temperature max (°C)
- Flow temperature max previous year (°C)
- Return temperature max previous year (°C)
- Operating hours
- Fault hours
- Fault hours previous year
- Yearly set day
- Monthly set day
- Meter date time
- Measuring range (m3ph)
- Settings and firmware
- Flow hours
Energy dashboard
Either heat usage or volume usage can be used as “Gas” on the energy dashboard. If you want to supply a price per MWh, make sure to apply the conversion factor first.
Polling the device
Polling is by default done only once per day (and once right after adding the integration). Every time the Heat Meter values are read, battery time of the device will (supposedly) go down by about 30 minutes.
Polling manually (optional)
For detailed control on when the device is polled, disable the default polling for this integration and create an automation that will update one of the entities (the other entities will be updated as well)
If you’re comfortable with YAML, this code could be used:
alias: "Heat Meter manual update"
triggers:
  - trigger: time
    at: "23:30:00"
actions:
  - action: homeassistant.update_entity
    target:
      entity_id: sensor.heat_meter_heat_usage_gj
For more detailed steps on how to define a custom polling interval, follow the procedure below.
Defining a custom polling interval
如果您想要定义一个特定的间隔来轮询您的设备以获取数据,可以禁用默认的轮询间隔并创建自己的轮询自动化。
要添加自动化:
- 转到 设置 > 设备与服务,并选择您的集成。
- 在集成条目上,选择
。 - 然后,选择 系统选项 并切换按钮以禁用轮询。
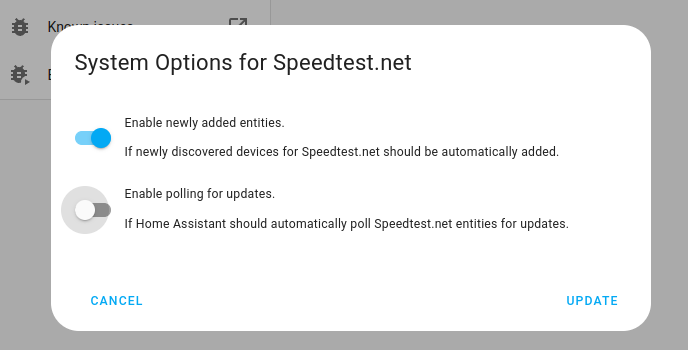
- 然后,选择 系统选项 并切换按钮以禁用轮询。
- 要定义您的自定义轮询间隔,创建一个自动化。
- 转到 设置 > 自动化与场景 并创建一个新的自动化。
- 定义您喜欢的任何触发器和条件。
- 选择 添加动作,然后选择 其他动作。
- 选择 执行动作,然后从列表中选择
homeassistant.update_entity动作。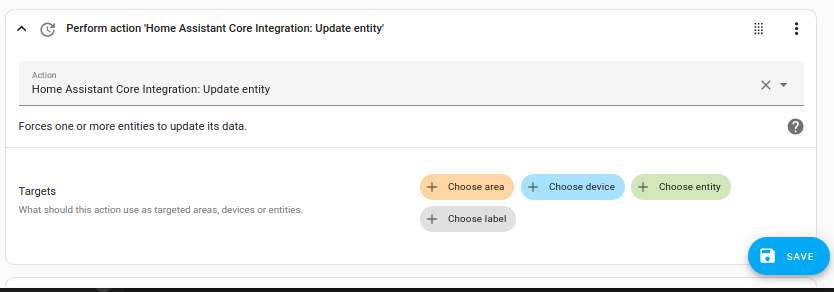
- 保存您的新自动化以轮询数据。